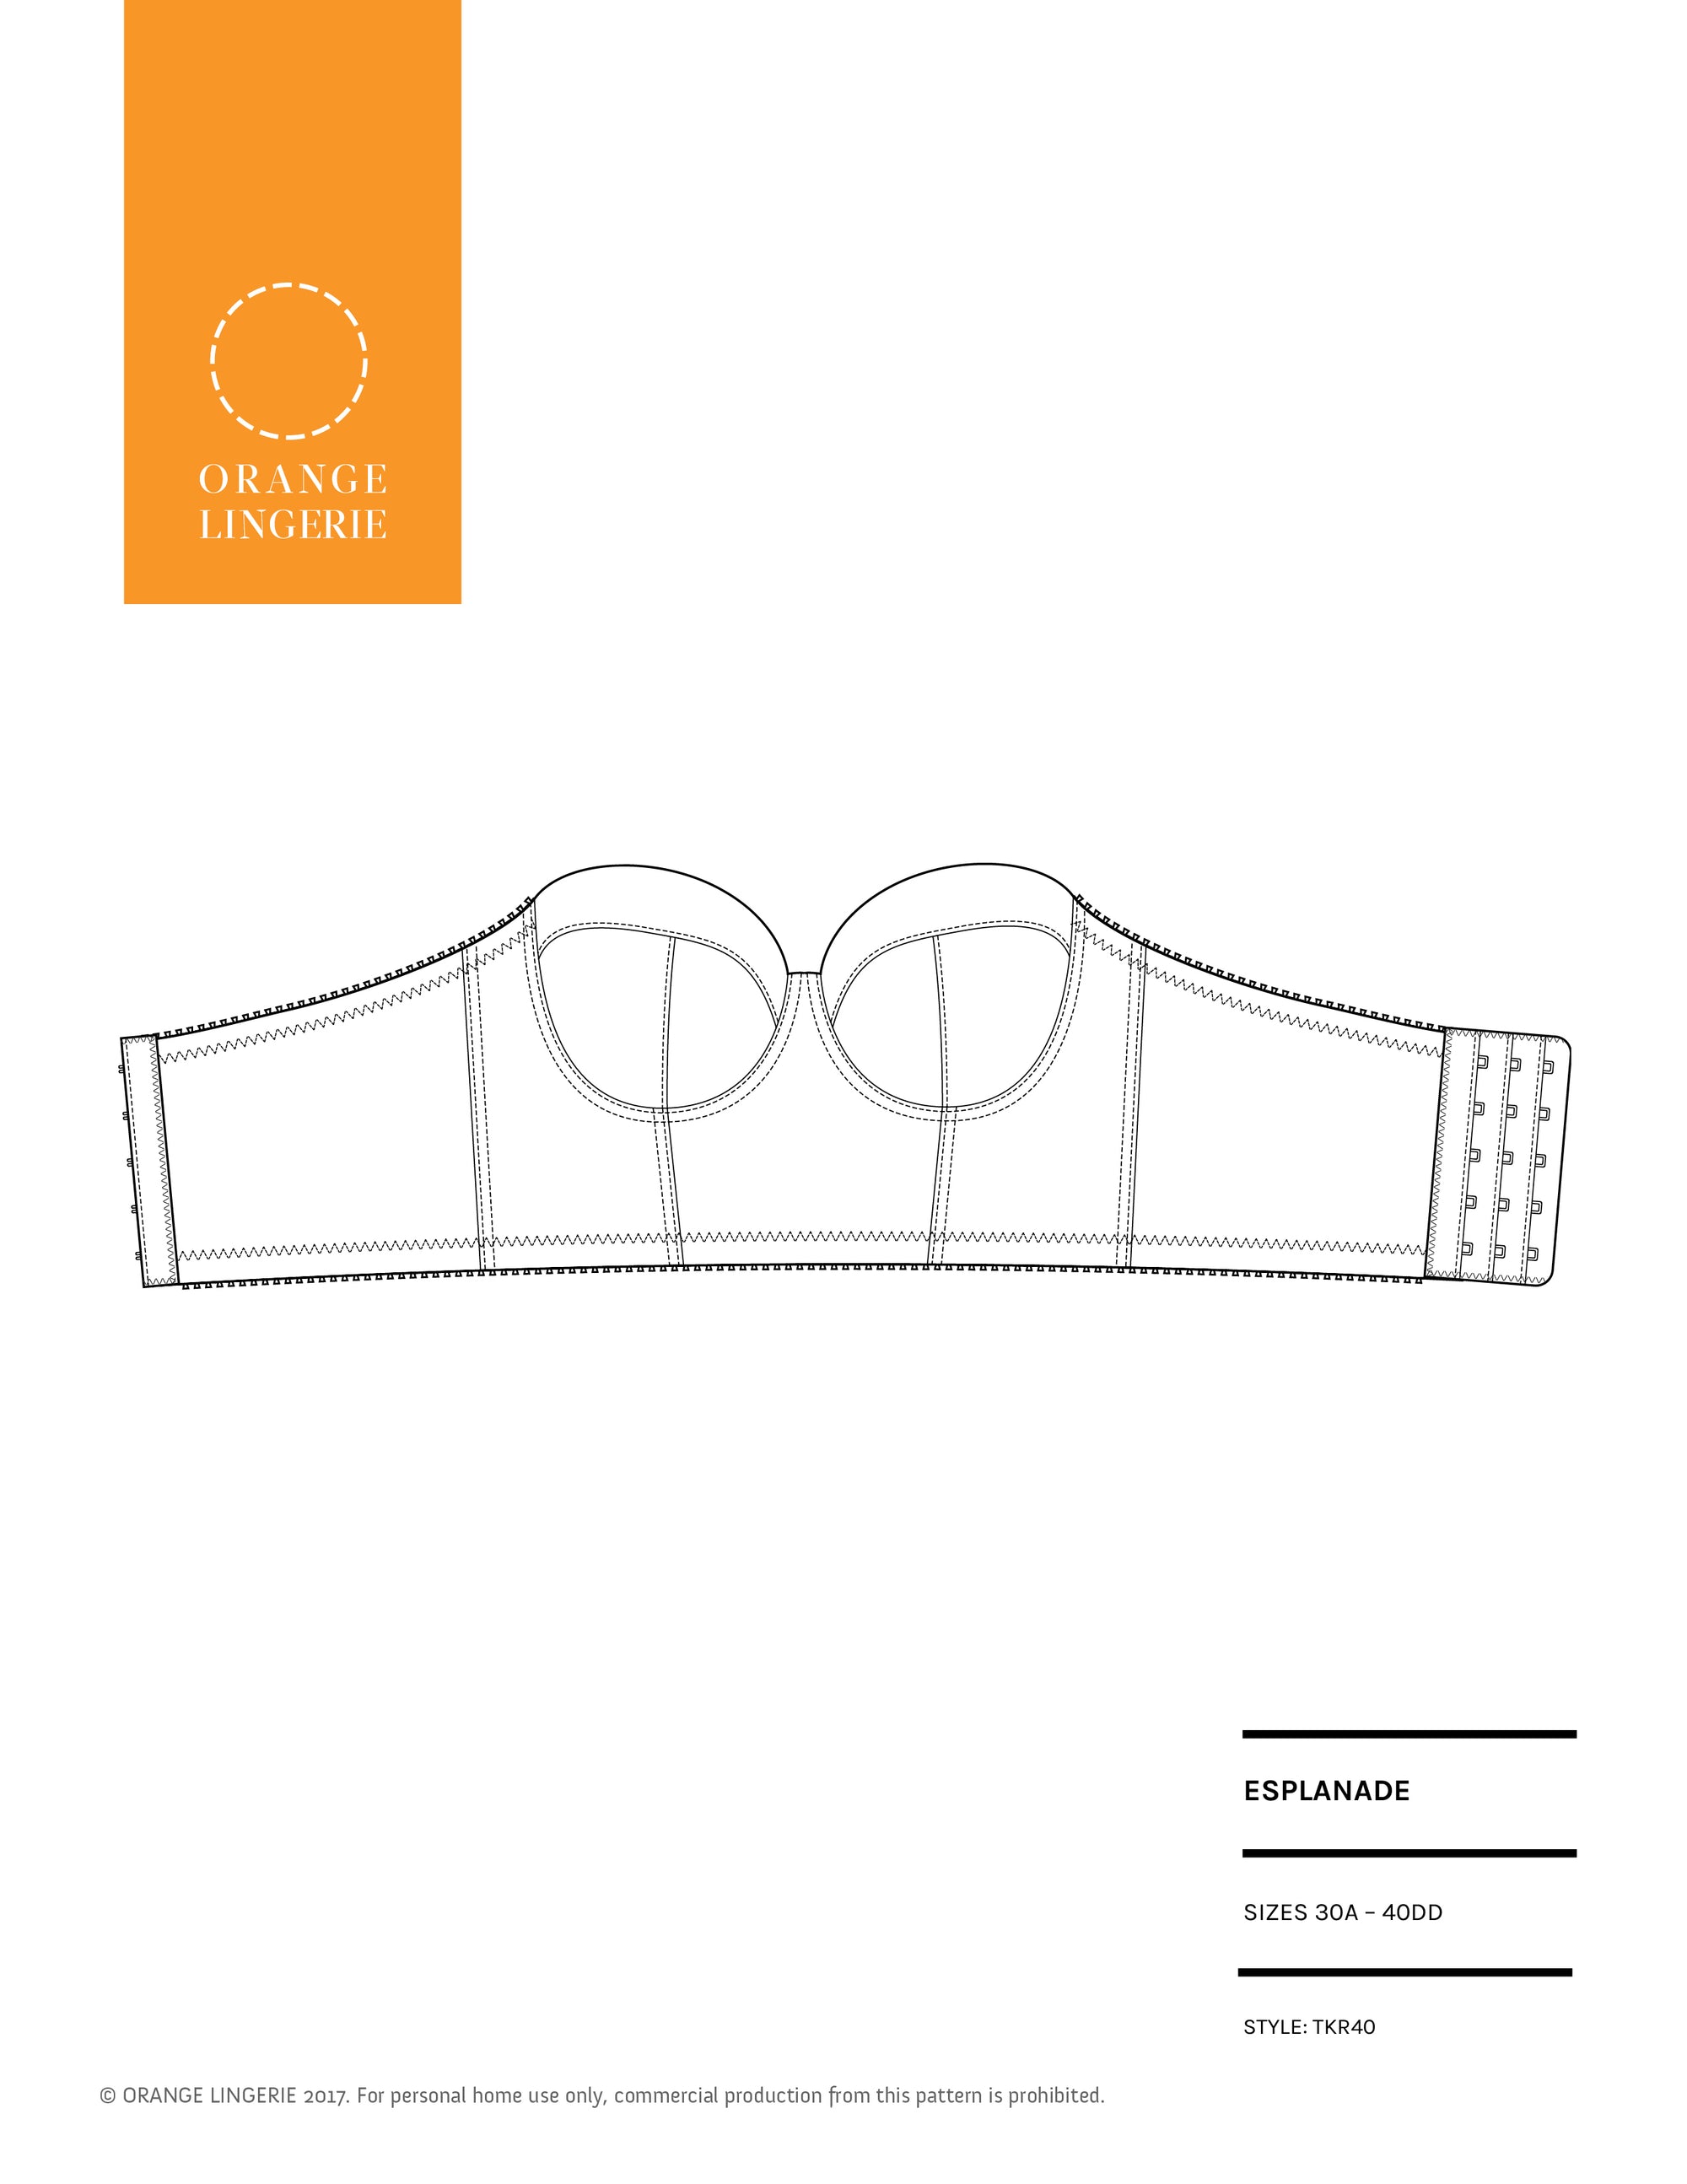
You have your pattern and your fabric and you can’t wait to dive in and sew up your project. While we all want to just get sewing, it is important to test your tools first! It only needs to take a few minutes and it can save you a lot of heartache. Want proof? Take a look at the silk charmeuse swatch below.
This was my test swatch for a bias silk chemise. Before I started sewing I cut a small swatch and headed to the machine. You can see from this swatch that the needle, a Universal 70, was not a good choice for this fabric. It left a trail of nastiness in its wake (the bottom left hand corner). I am glad I discovered this on a test swatch! I switched to a Microtex needle and everything was good.

Following is my short list of the tools to check before you start sewing!
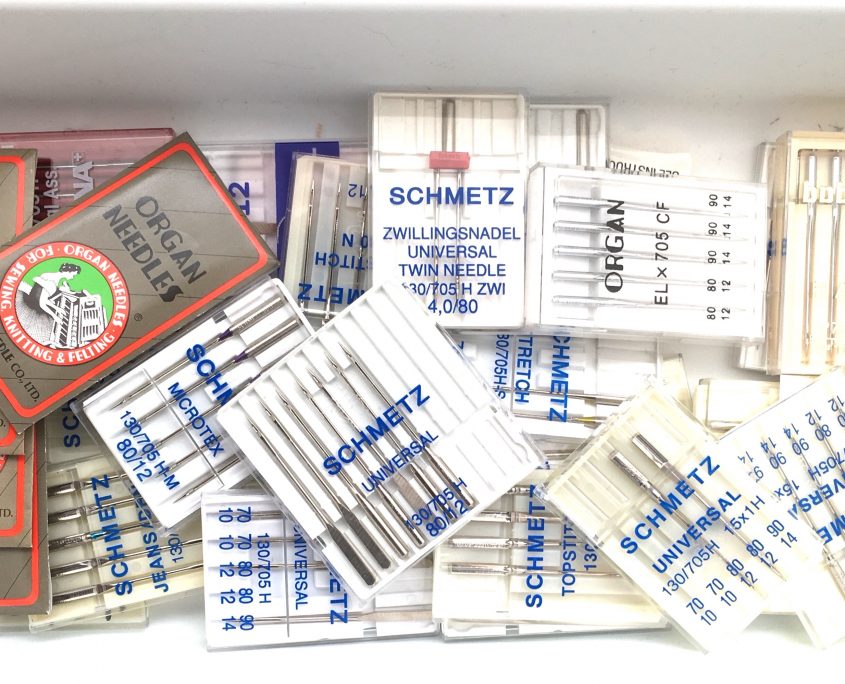
Sewing Machine Needle
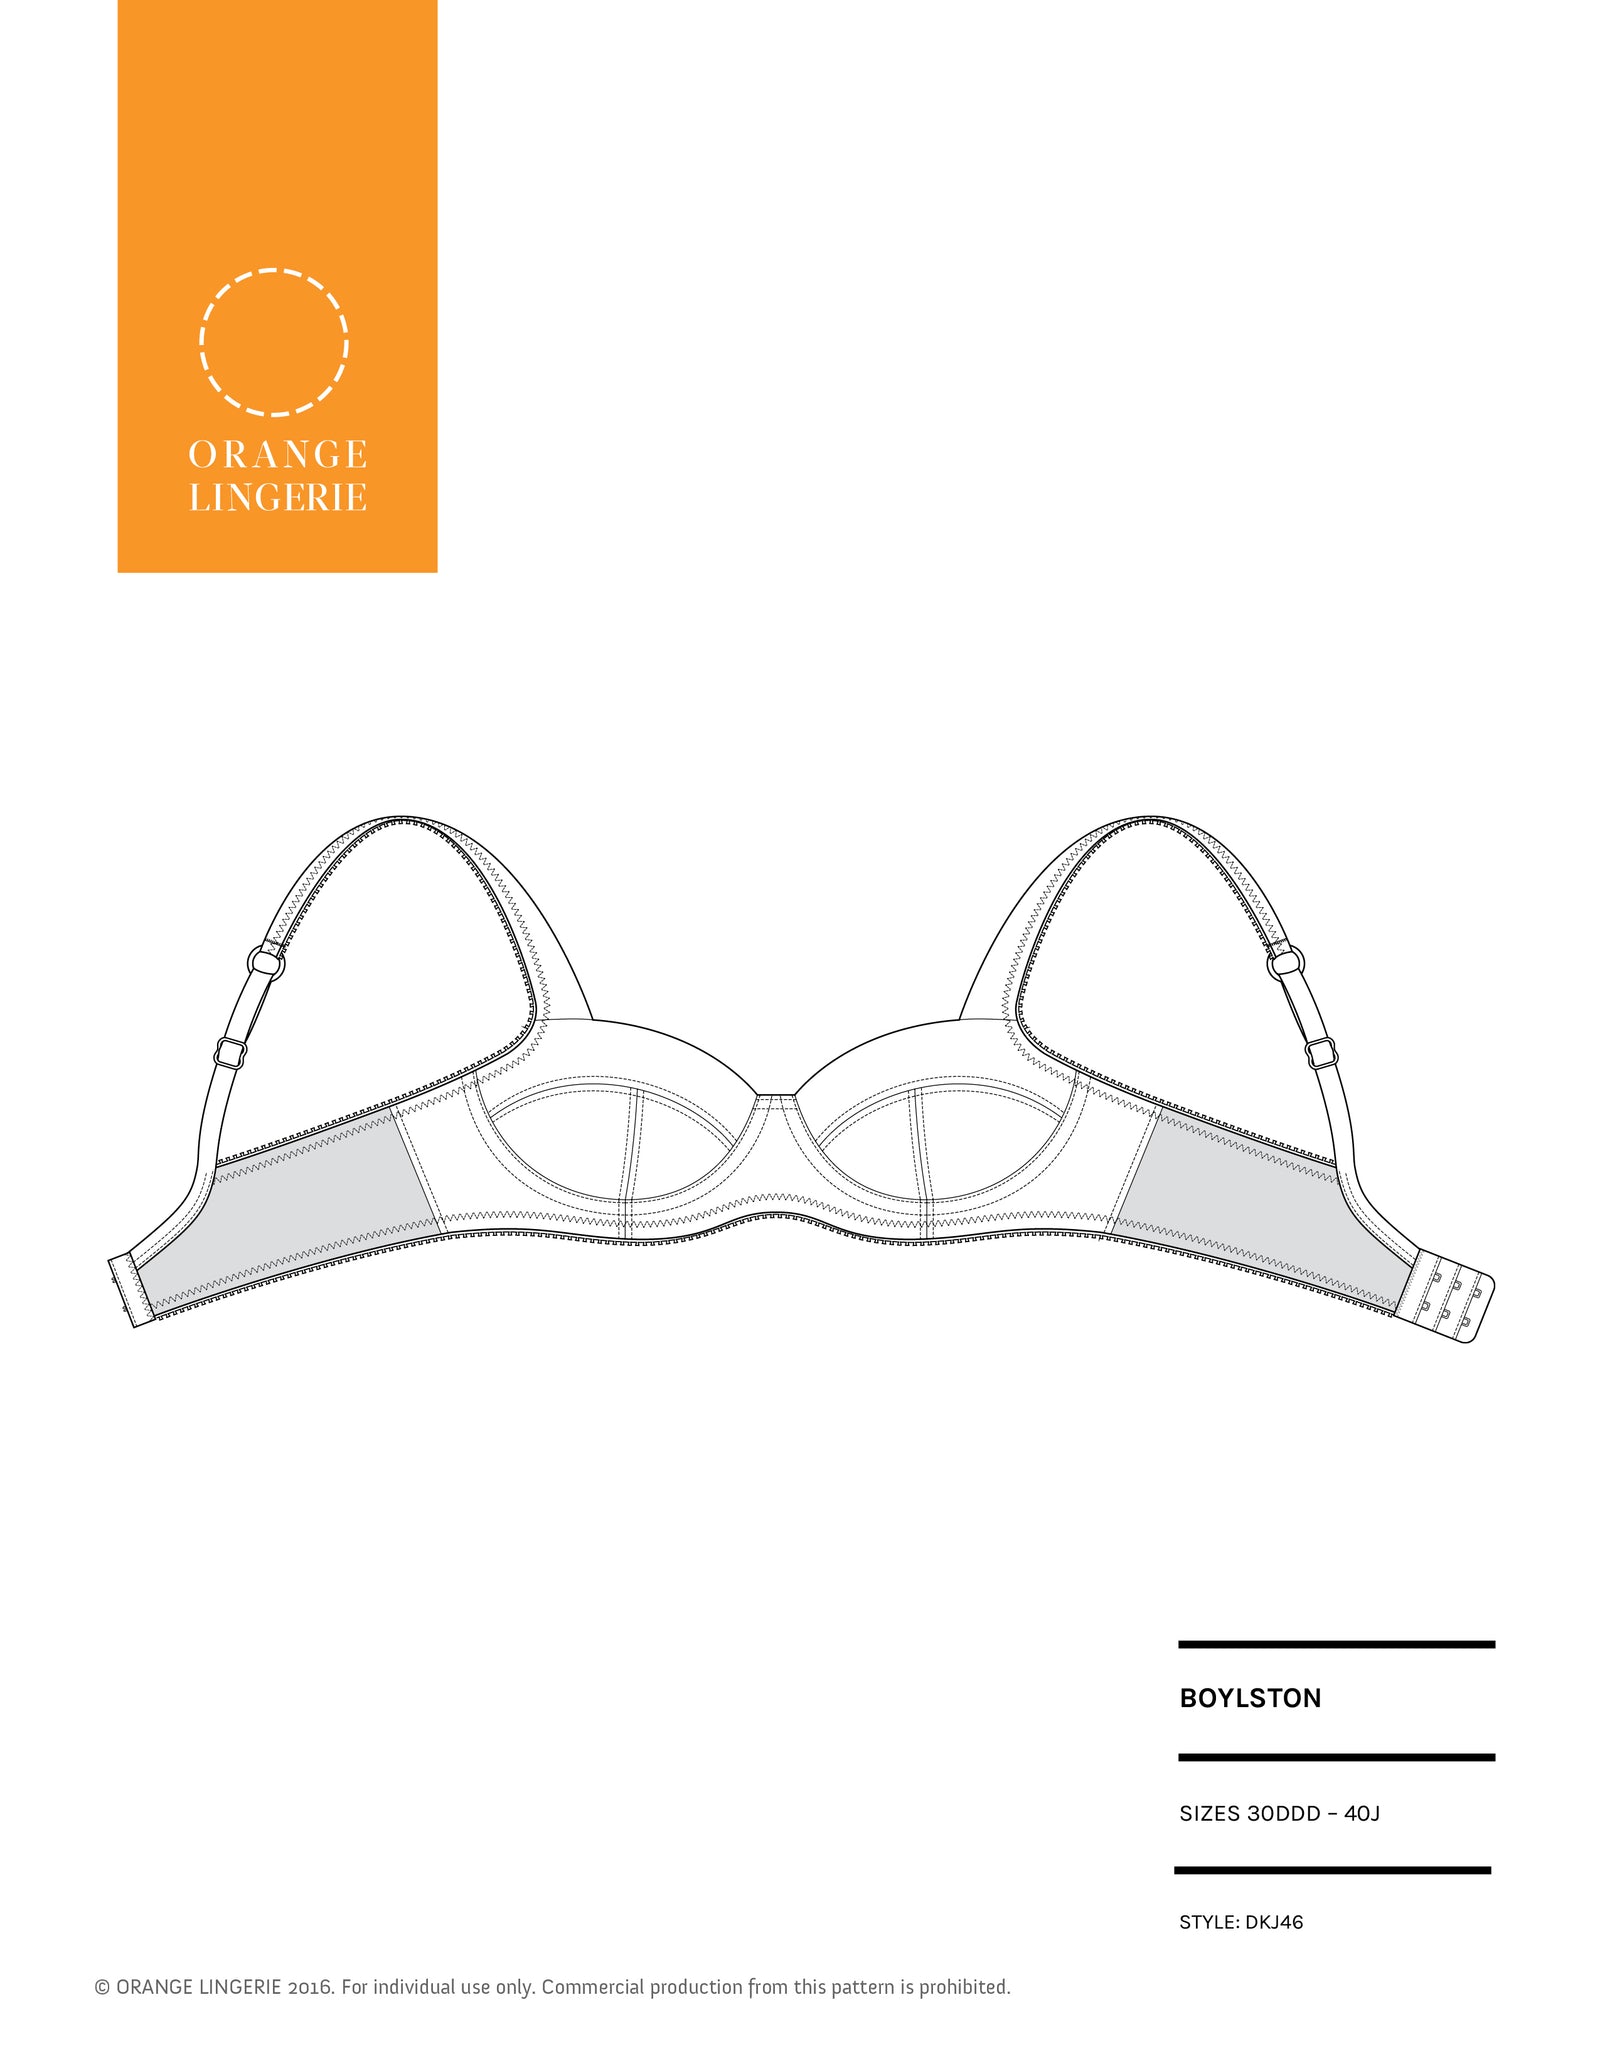
Sewing a test seam is not only a chance to test your needle choice but also a good check to be sure you are not just using what happens to be in the machine! It is also good to take a look at the presser foot to see if it makes the most sense for your project. For example, I don’t want to use the straight stitch foot and single stitch plate for making a bra but for a silk bias chemise, those are both great choices.
Machine Thread
I use Gütermann Mara 120 thread for lingerie but that is not the best choice for all my projects. There are times a cotton or silk thread will make the most sense for my fabric.

Machine Stitches, Length and Tension
Examine the quality of the stitches (including buttonholes, if applicable) that you plan to use for your project. When making bras I check the appearance of the straight stitch, zigzag and 3-step zigzag stitches. On the silk swatch at the beginning of this post, I tested the zigzag stitch to see what settings worked best to attach the lace. If I need to make any adjustments to the machine, I want to find out on the swatch, before I get absorbed in my project. Same thing goes for the presser foot pressure!
Cutting tools
As I mentioned in my post on cutting fabric, be sure your cutting tools are sharp! Dull tools will shred the fabric rather than cutting it cleanly and precisely.
Pins
If you are using pins (and I advise you don’t!) check to see if they leave any marks in the fabric. If they do you can plan to place pins only in the seam allowances or use Wonder Clips (test them out first, of course!).

Markers
As I discussed in my post on marking your fabric, be sure any marker you use disappears completely. The only way to know is to mark the fabric, remove the marking and then wash and dry the fabric as you plan to treat the finished garment. Admittedly, this test takes a little longer!
Interfacing/Stabilizers
Check to see if your choices give you the results you want. While my first choice for silk is silk organza or silk chiffon, that is not the right choice for a tricot fabric where strips of nylon sheer or tricot are preferred. If you are trying any of my fabric manipulation tricks, then you definitely want to trial those first!
Work Surfaces
Be sure there is no dust, dirt, oil or other items on your work surfaces that could mar your fabric, especially if you are working with a delicate fabric or light colors.
Want to save time testing? Take notes! Note your choices and the machine settings that work best for the fabrics you use the most. Once you have done that, a simple test seam on a scrap of the fabric to check your machine needle will be the only test between you and sewing your project!
Do you have any sewing project preparation tips? Add yours to the comments!
Note: This post contains some affiliate links and if you click through and make a purchase I will be compensated.